In this blog, we are going to see how we can Integrate Slack(Service Provider) with HyperSign SSO(Password-less Identity provider) using a custom SAML 2.0 configuration. Before we see what exactly we need to do to integrate Slack with HyperSign SSO, let’s see what SAML2.O is all about.
SAML2.0
Security Assertion Markup Language (SAML) is an open standard that allows identity providers (in this case its HyperSign) to pass authorization credentials to service providers (like Slack, office 365, salesforce, etc), and with that, using single Identity provider, a user can log in to multiple websites without having to maintain multiple credentials.
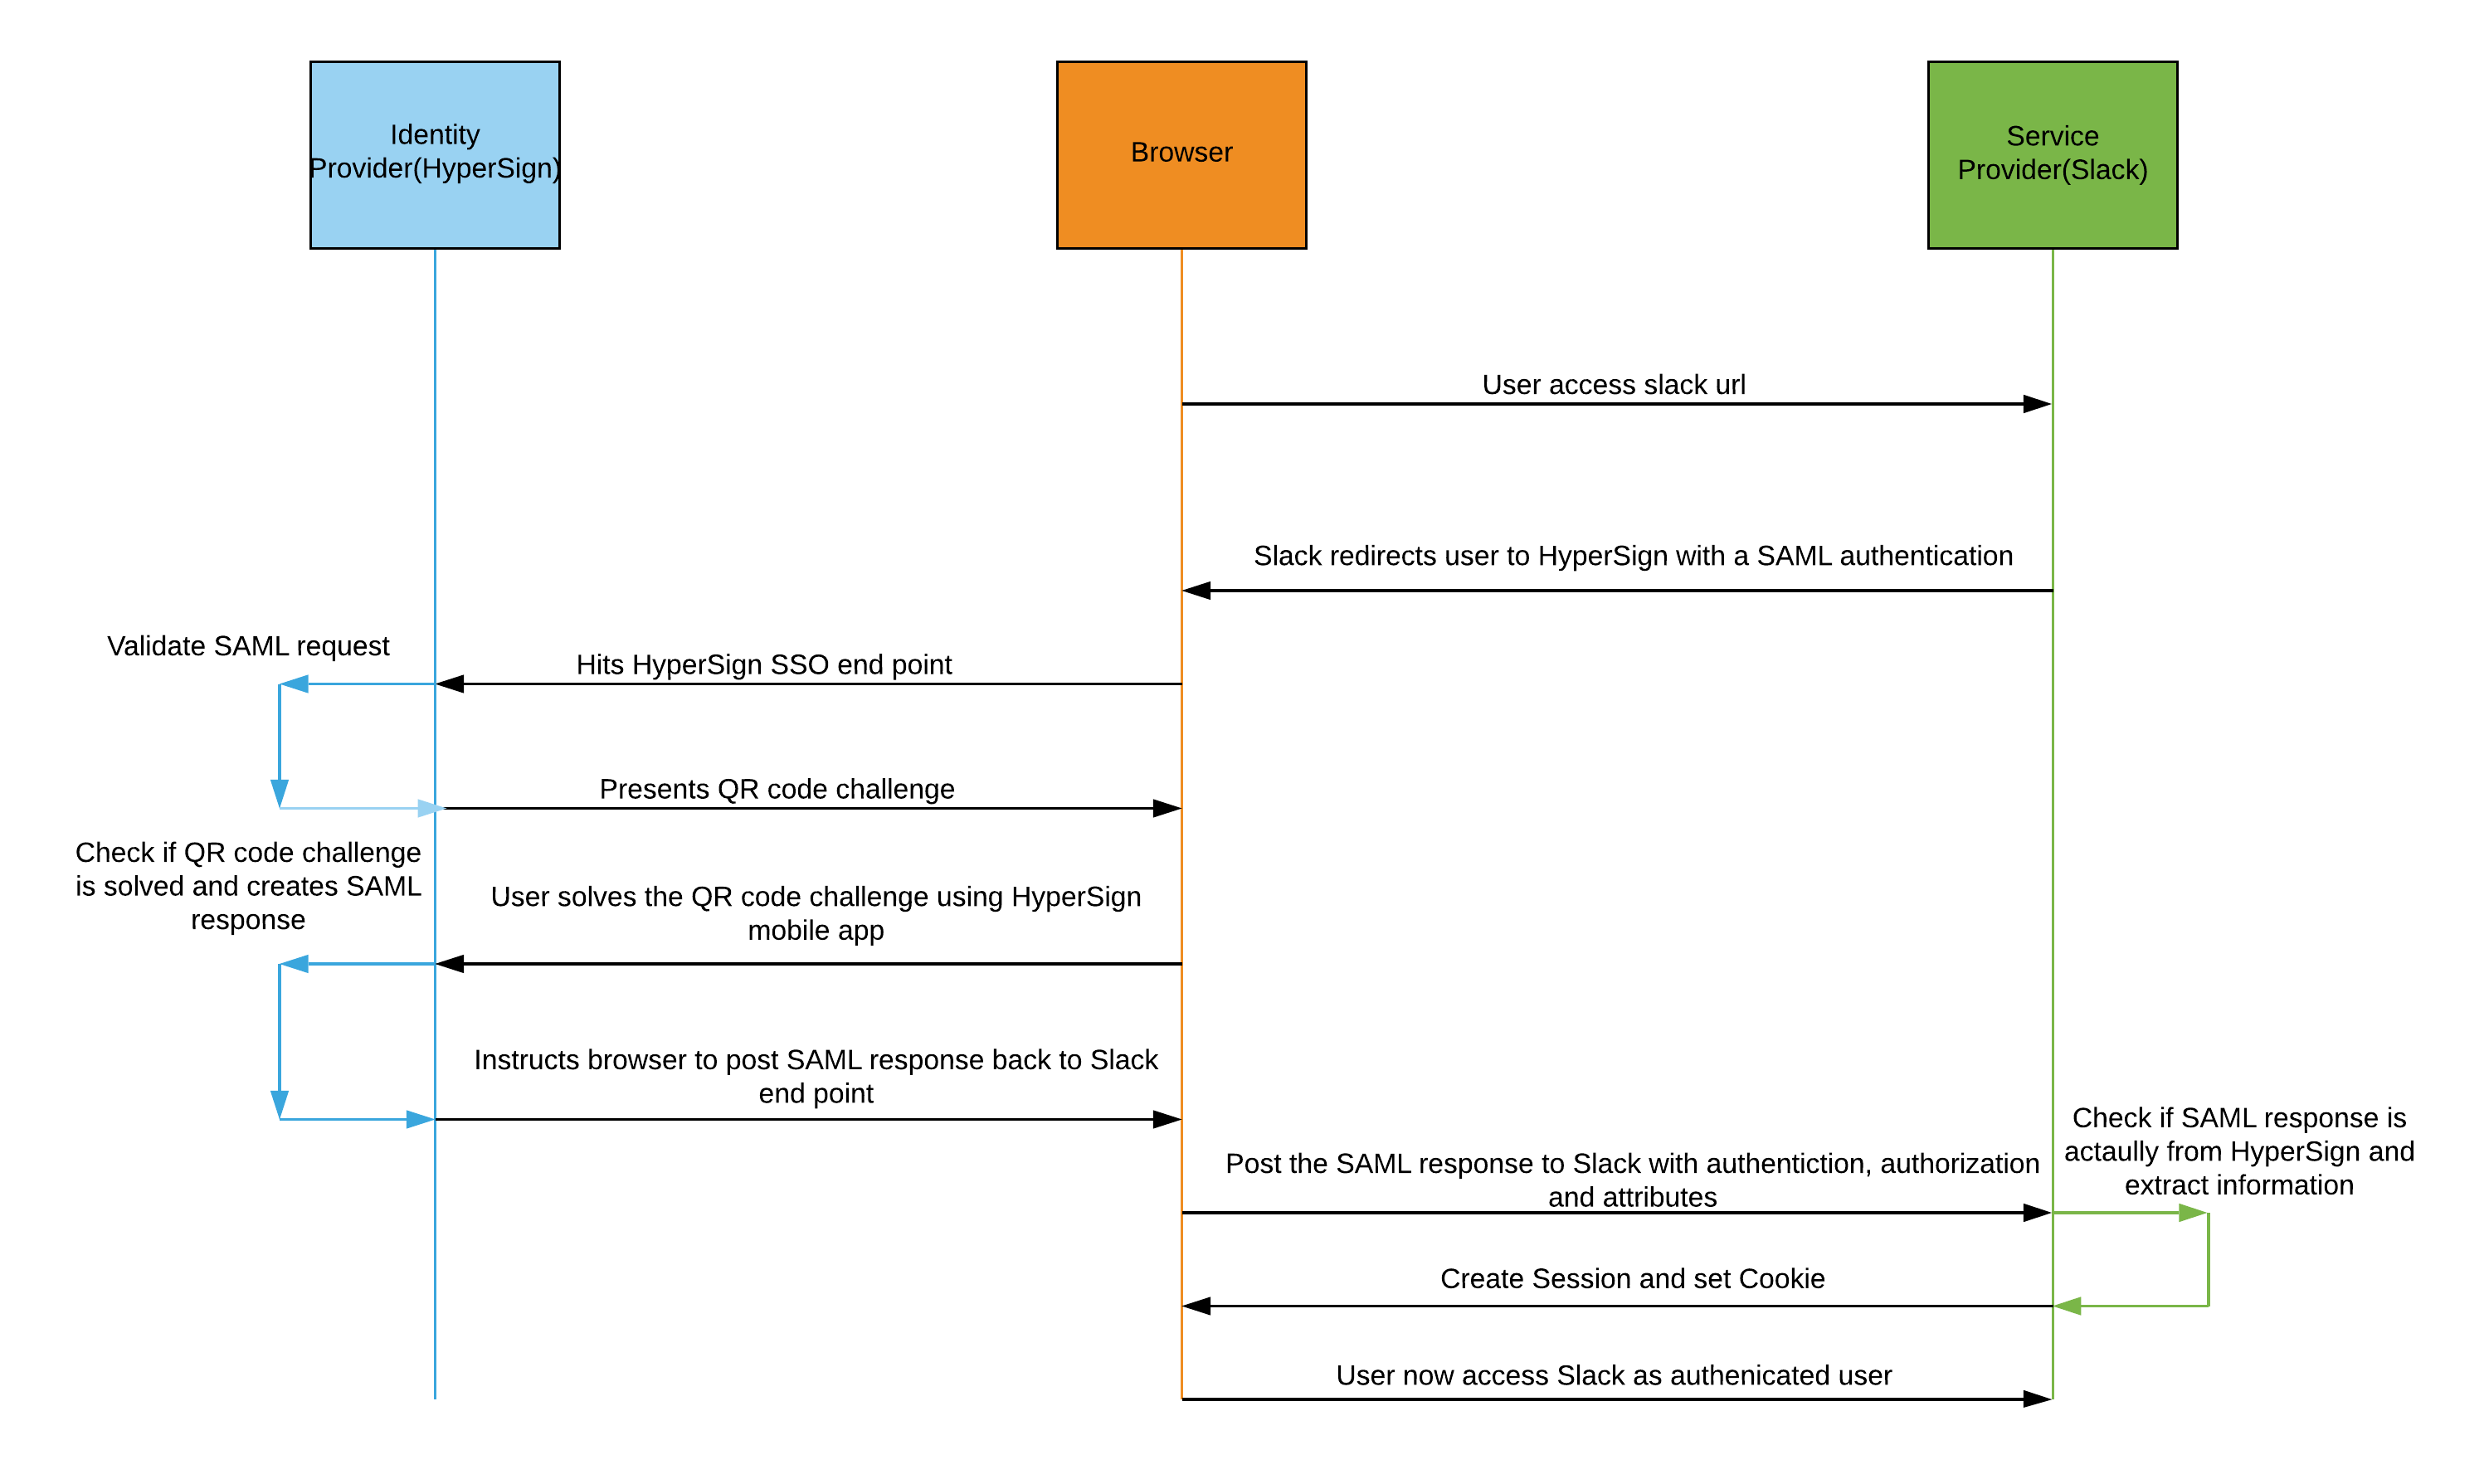
So in our case when a user logs into Slack, it requests authorization from the HyperSign. HyperSign authenticates the user’s credentials by asking the user to solve the QR Code challenge using the HyperSign authenticator and then returns the authorization and user’s attributes(like email address, first name, last name, etc.) to Slack, and the user is now able to use the Slack. All this is possible because both of those systems speak the same language - SAML 2.0.
As we can see, one of the main advantages of SAML adoption is that it allows us to use the software as a service (SaaS) solutions while maintaining a single secure federated identity management system. Now for SAML authentication to work, HyperSign and Slack need to agree upon the exact configuration of SAML. In case you need to learn more about SAML 2.0, please go here and read more about SAML 2.0.
The below diagram nicely summaries all the transactions that happens between Slack and HyperSign.
Let us now see how HyperSign and Slack need to be configured for SAML authentication to work.
HyperSign Configuration
First you need to login to HyperSign Admin console.
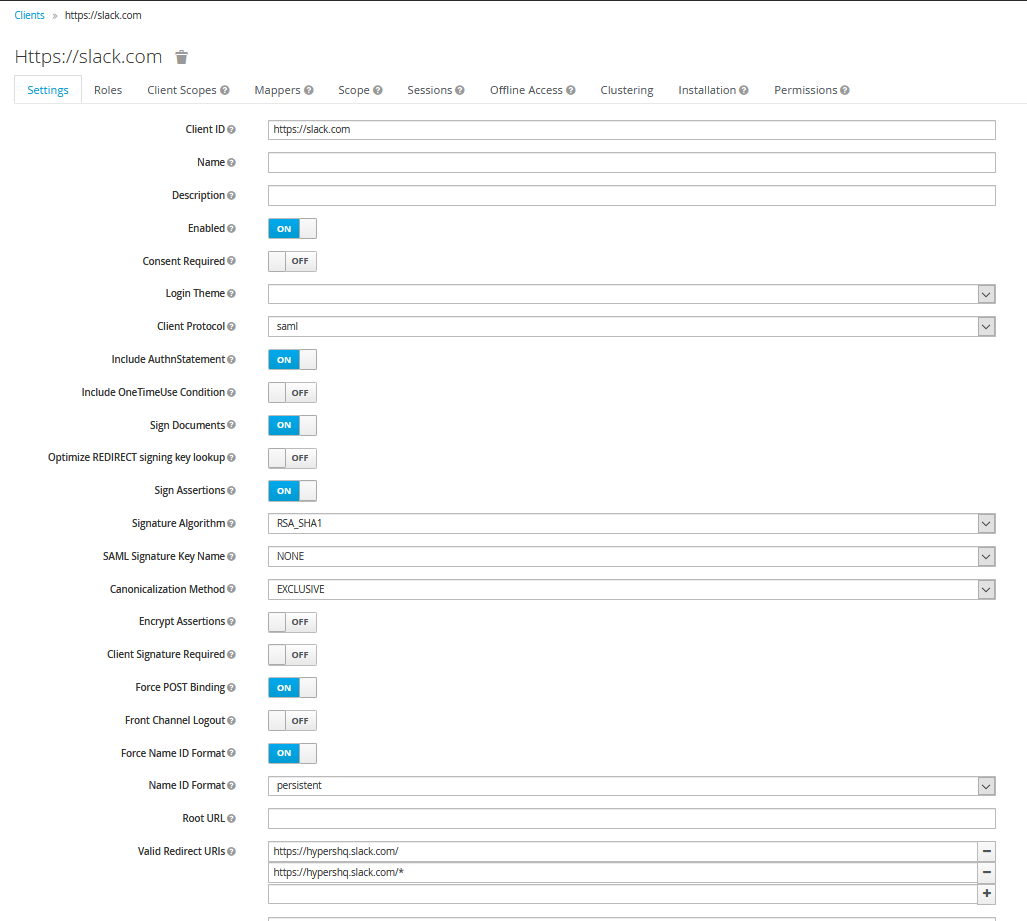
- Create a new client with the following settings
- Set client ID to https://slack.com
- Set the Client Protocol to SAML
- Set Include AuthnStatement to ON
- Set Sign Documents to ON
- Set Sign Assertions to ON
- Set Signature Algorithm to RSA_SHA1
- Set SAML Signature Key Name to NONE
- Set Force POST Binding to ON
- Set Force Name ID Format to ON
- Set Name ID Format to persistent
- Set Valid Redirect UIs to 2 values
- https://[your-slack-url]/
- https://[your-slack-url]/*
- Set Assertion Consumer Service POST Binding URL to https://[your-slack-url]/sso/saml -This is the Slack end point where all the responses will be sent using POST method.
- Set Logout Service POST Binding URL to https://[your-slack-url]/sso/saml/logout
- The value of [your-slack-url] is the actual slack URL for your account, for example hypershq.slack.com/
-
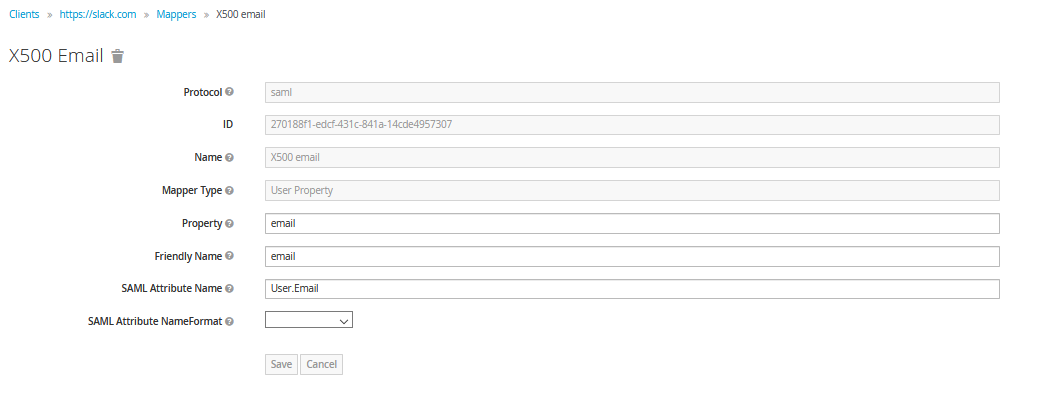
Mapper configuration -Mappers are nothing but SAML Assertion. Its the XML document that the identity provider sends to the service provider that contains information like authentication, attribute(email, first name, etc.), and authorization (roles, etc.) decision. For Slack to work with HyperSign, we need to configure mapper as follows.
- Click the Add Builtin button .
- Select X500 email
- Set SAML Attribute Name to User.Email
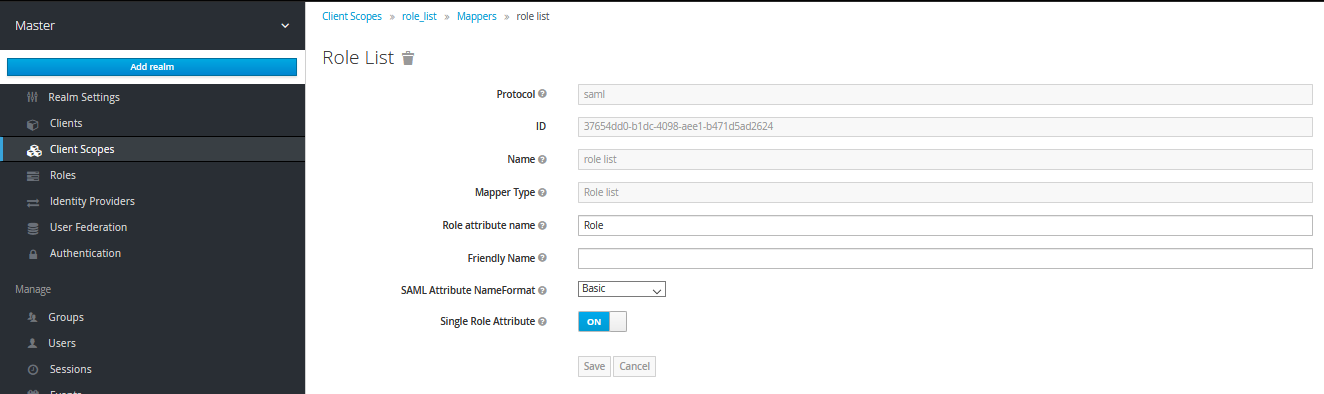
- Next, Slack expects only one role in the response, so to make sure HyperSign sends only one role back to Slack, go to the client scope and select “Role_list”, then select “mappers” tab and then again select “role_list” and make sure that “Single Role Attribute” is set to ON.
-
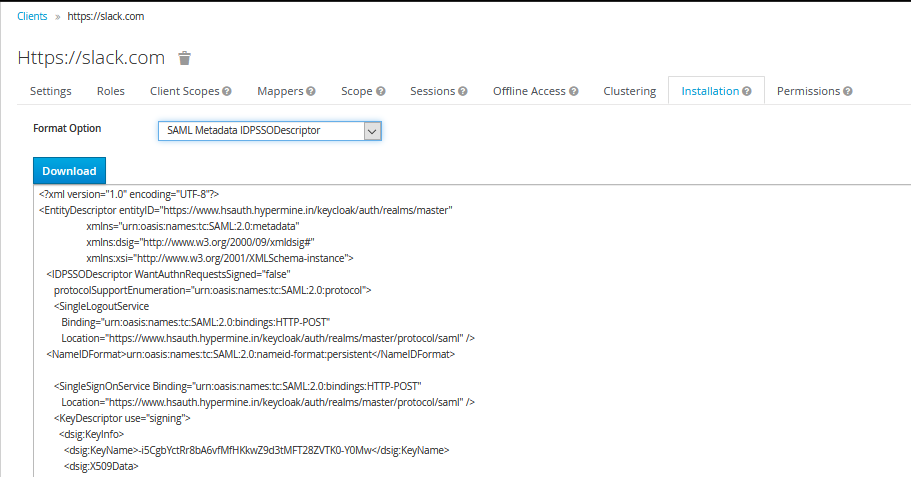
Next, go to the installation tab and select the Format Option SAML Metadata IDPSSODescriptor. This XML document has all the information that you need in the next step.
Slack Configuration
Now that Configuration is all set from the HyperSign side, let’s go ahead and configure Slack. To perform the following operations, you need to be a slack admin.
-
Go to the Settings and Permissions
-
Click on the authentication tab and then go to SSO configuration.
-
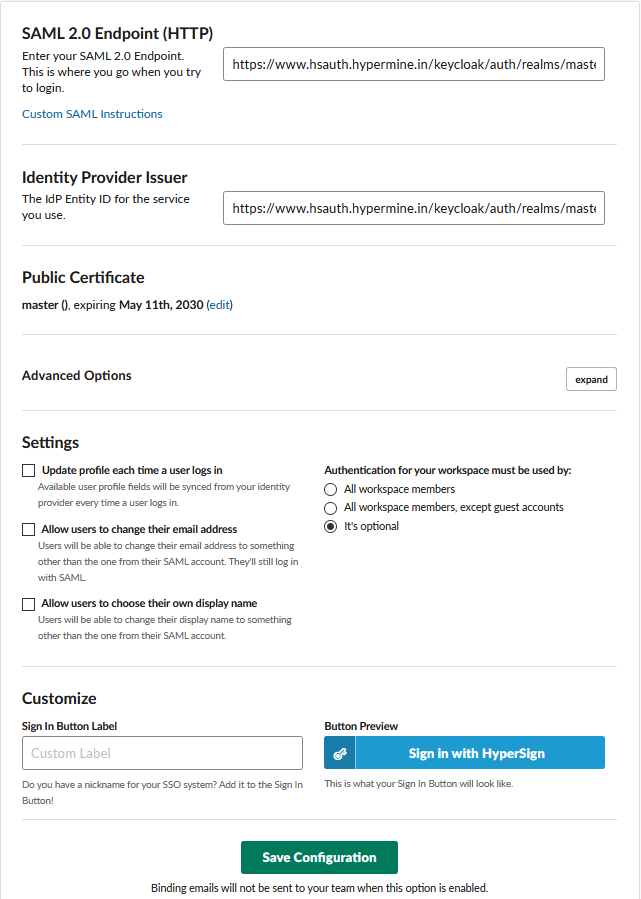
Click on the custom SAML 2.0 options and perform the following operations.
- Set SAML 2.0 Endpoint (HTTP) to https://www.hsauth.hypermine.in/keycloak/auth/realms/master/protocol/saml. (This is available in the SAML XML metadata that we downloaded in the previous step inside the SingleSignOnService “Location” attribute )
- Set Identity Provider Issuer to https://www.hsauth.hypermine.in/keycloak/auth/realms/master.(This is available in the SAML metadata that we downloaded in the previous step inside the EntityDescriptor “entityID” attribute )
- Set Public Certificate by copying it from “dsig:X509Certificate” tag.
- Under advanced settings select both “Responses Signed” and “Assertions Signed”.
- Keep Settings options as it is.
- Finally, you can customize the sign-in button using the “Customize” option.
- Clicking on the Save configuration button will take you to the HyperSign login page to test the integration.
- Now go to the Slack URL on the login page and click on the “Sign in with HyperSign” button.
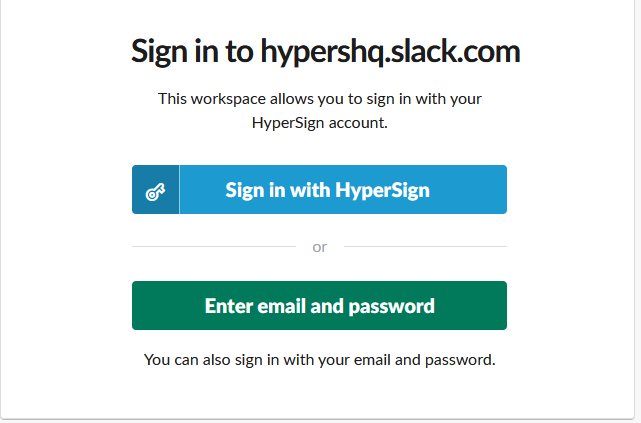
- Click on “login with HyperSign” and you will be presented with a QR code challenge. Now that you see the QR code, you can scan it and authenticate it using HyperSign mobile app. For more information on the HyperSign mobile app, please go here.

Voila! Slack is now successfully integrated with HyperSign SSO. Next time when you have to log in to your Slack account, all you have to do is to scan the QR code and you are all set to rock and roll without having to worry about maintaining and remembering the username and password.